


Realistic Ultrasound Training for Veterinary Professionals: Meet 'Lillie'
September 23, 2025
Imagine being able to hone your ultrasound skills without the pressure of a live patient — no stress, no unpredictability, just focused, effective learning. That’s exactly what the ‘Lillie’ Canine Ultrasound Phantom Training Kit is designed for.
Whether you’re just beginning your journey in veterinary ultrasound or looking to refine a well-practiced technique, ’Lillie’ offers a realistic and reliable training solution. It’s perfect for self-guided learning as well as formal teaching environments, giving you the opportunity to build precision and confidence long before you ever pick up the probe in a clinical setting.
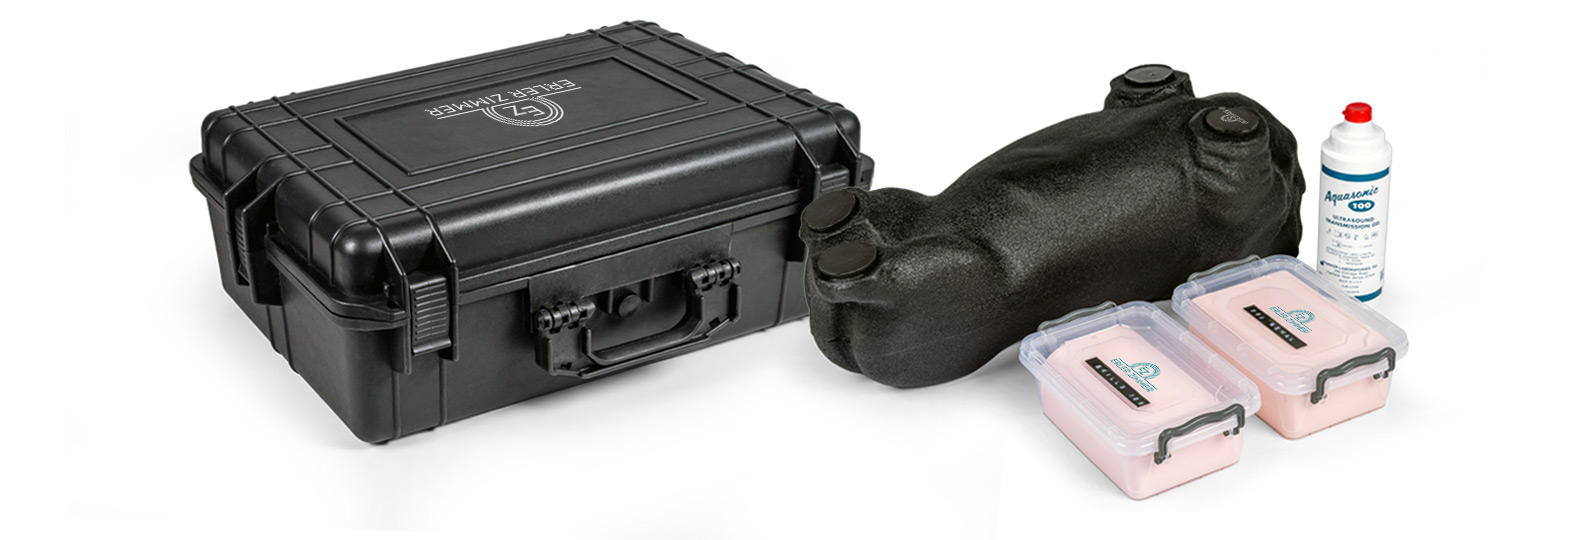
Each kit arrives in a robust, lockable case, built for safe storage and easy transport — because your tools should work as hard as you do. To help you get the most out of your investment, we include clear care instructions so your phantom stays in optimal condition over time.
What makes ’Lillie’ truly unique is the attention to detail: every phantom is individually inspected via ultrasound before it leaves our hands, ensuring it meets stringent quality standards. We document every feature and imperfection, so there are no surprises — just consistent, high-quality training.
Crafted from a specialized, tissue-mimicking plastic, each phantom is made to last with proper care. The kit also includes a self-healing fine needle aspiration (FNA) training block, designed to withstand repeated use — although, over time or with heavy practice, needle marks may appear, affecting longevity.
With ’Lillie’, you’re not just practicing — you’re preparing. Thoughtfully designed, rigorously tested, and built for real-world learning, it’s more than a training tool. It’s a step toward clinical confidence.
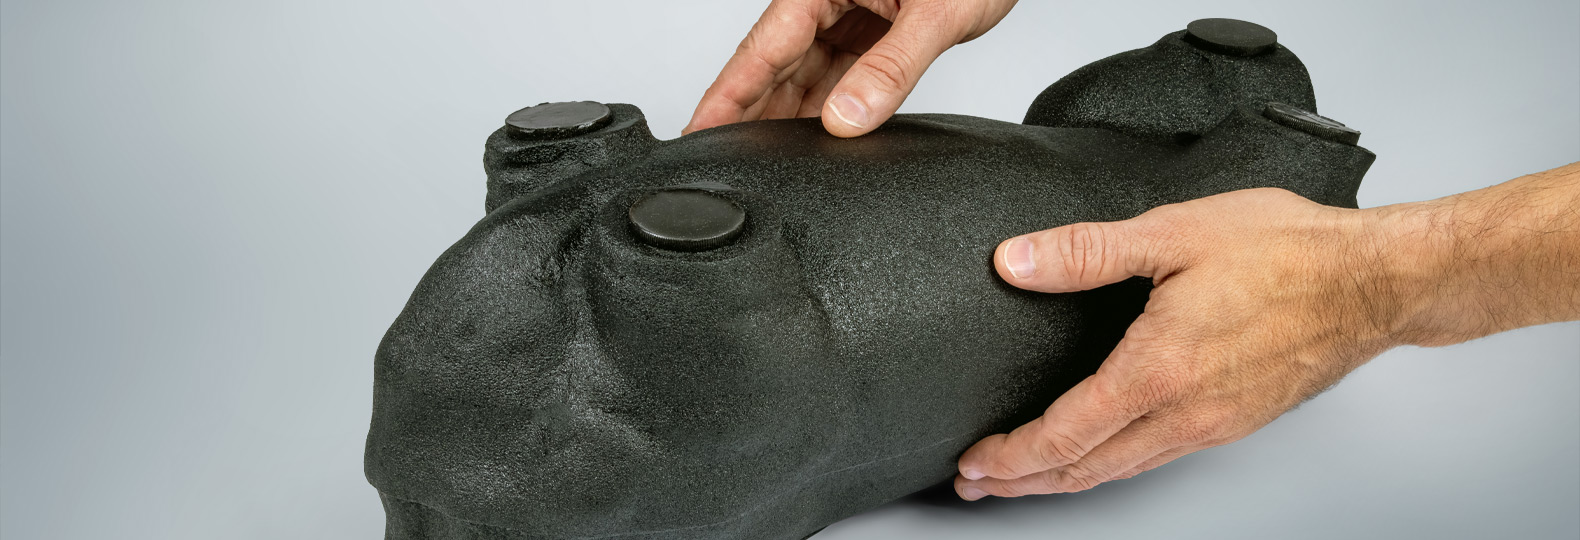
Getting the Most from the 'Lillie' Canine Ultrasound Phantom
The ‘Lillie’ Canine Ultrasound Phantom Model is handcrafted, a process which involves 70+ production steps and 35 moulds, so each model is unique. Designed for training, it includes key canine abdominal structures. Whilst not an exact replica, the detailed craftsmanship ensures an authentic ultrasound appearance, which closely mimics real patients.
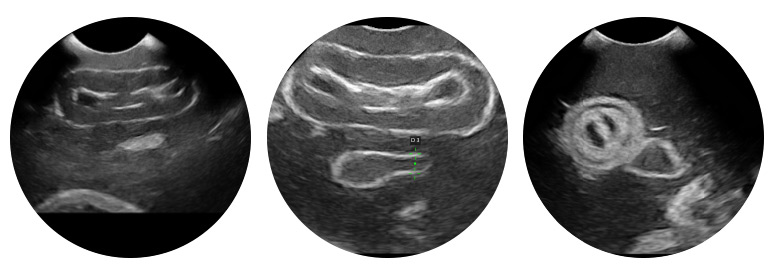
Position #1: Dorsal Recumbency
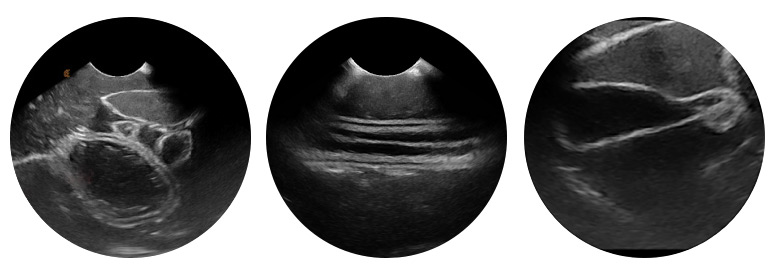 In dorsal recumbency, users practice identifying key abdominal structures such as the stomach, pyloric region, duodenum, liver, and gallbladder in both long and short axis views. The training focuses on adjusting depth, gain, time gain compensation, dynamic range, and zoom controls to optimise image clarity and contrast. Trainees refine probe positioning by rotating and sliding to capture different orientations, improving spatial understanding. Measurements of structures like the cystic duct enhance precision and confidence. This position helps develop reproducible scanning techniques and enhances interpretation before working with live patients.
Position #2: Left Lateral Recumbency
 Left lateral recumbency training emphasizes locating and assessing the right kidney and adrenal gland, honing skills in optimising focus depth, focal zones, frequency, and zoom for detailed imaging. Users practise measuring organ dimensions accurately and comparing repeated measurements to ensure consistency. Additionally, following the duodenum’s path in both long and short axes helps refine probe movement isolation and image optimisation. Identification and imaging of the right pancreatic limb further develop anatomical recognition and scanning versatility. This position strengthens control over probe manipulation and image quality for confident ultrasound assessment.
Position #3: Right Lateral Recumbency
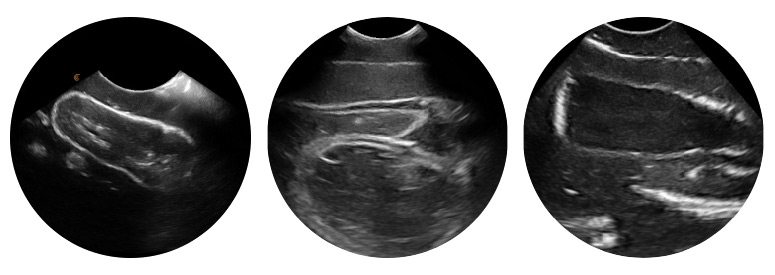 In right lateral recumbency, users focus on locating and optimising images of the left kidney in both long and short axis views, practising probe alignment to maintain the kidney’s horizontal orientation for accurate measurements. They perform comparative measurements with the kidney horizontal and non-horizontal to understand the impact of probe positioning. The training extends to imaging the left adrenal gland, adjusting depth, frequency, zoom, and focus for clear, reproducible assessments, including repeated measurements for consistency. Participants also examine the spleen’s extent and echotexture, practising overlapping sweeps to fully map this and adjacent organs. Finally, scanning the urinary bladder in multiple planes and optimising controls helps highlight anechoic content and outline clarity, reinforcing comprehensive ultrasound skills.
How to Assess a Structure on Ultrasound
LEMONS:
L ocation (e.g., anatomical, focal, diffuse)
E chotexture (e.g., hypoechoic, isoechoic, hyperechoic, heterogenous, homogenous)
M easurements (e.g., small, moderate, large, gross or a finite measurement inmm or cm units)
O utline (e.g., irregular, well- or ill-defined, smooth, poorly marginated)
N umbers (e.g., finite number, several, multiple)
S hape (e.g., ovoid, rounded, fusiform, amorphous)
Discovering the 'Skills' Ultrasound Phantom Block
Using the skills phantom block, users align the probe’s long axis with the block to explore and identify all embedded objects from multiple scan angles. Rotating the probe around each object helps build a 3D spatial understanding of their shapes, which vary in complexity. Trainees optimise images and annotate their impressions, capturing representative long and short axis views to confirm their interpretations. Special focus is given to tracking an anechoic tubular structure in both planes, practising fine motor skills essential for following similar pathways in patients. Accurate luminal diameter measurement with proper caliper placement reinforces precision, with reflection on its clinical relevance during abdominal scanning.
Aligning a Needle with the Scan Plane
Users align the probe’s long axis with the phantom block to fully assess the kidney from multiple planes, comparing its ultrasound appearance to the ‘Lillie’ Phantom. They measure regions of interest and capture optimised long and short axis images, using the ‘L.E.M.O.N.S.’ criteria to report findings. Following top tips, trainees plan and practice fine needle aspiration (FNA) of a renal mass, adjusting dynamic range to enhance needle visibility. The technique includes deciding hand dominance for probe and needle control, anchoring the probe to minimise movement, and guiding the needle in-plane toward the target. Users then switch hands to build ambidextrous confidence and precision.
👉 Ready to take your training to the next level?
Contact us here.
Whether you’re just beginning your journey in veterinary ultrasound or looking to refine a well-practiced technique, ’Lillie’ offers a realistic and reliable training solution. It’s perfect for self-guided learning as well as formal teaching environments, giving you the opportunity to build precision and confidence long before you ever pick up the probe in a clinical setting.
Each kit arrives in a robust, lockable case, built for safe storage and easy transport — because your tools should work as hard as you do. To help you get the most out of your investment, we include clear care instructions so your phantom stays in optimal condition over time.
What makes ’Lillie’ truly unique is the attention to detail: every phantom is individually inspected via ultrasound before it leaves our hands, ensuring it meets stringent quality standards. We document every feature and imperfection, so there are no surprises — just consistent, high-quality training.
Crafted from a specialized, tissue-mimicking plastic, each phantom is made to last with proper care. The kit also includes a self-healing fine needle aspiration (FNA) training block, designed to withstand repeated use — although, over time or with heavy practice, needle marks may appear, affecting longevity.
With ’Lillie’, you’re not just practicing — you’re preparing. Thoughtfully designed, rigorously tested, and built for real-world learning, it’s more than a training tool. It’s a step toward clinical confidence.
Getting the Most from the 'Lillie' Canine Ultrasound Phantom
The ‘Lillie’ Canine Ultrasound Phantom Model is handcrafted, a process which involves 70+ production steps and 35 moulds, so each model is unique. Designed for training, it includes key canine abdominal structures. Whilst not an exact replica, the detailed craftsmanship ensures an authentic ultrasound appearance, which closely mimics real patients.
Position #1: Dorsal Recumbency
In dorsal recumbency, users practice identifying key abdominal structures such as the stomach, pyloric region, duodenum, liver, and gallbladder in both long and short axis views. The training focuses on adjusting depth, gain, time gain compensation, dynamic range, and zoom controls to optimise image clarity and contrast. Trainees refine probe positioning by rotating and sliding to capture different orientations, improving spatial understanding. Measurements of structures like the cystic duct enhance precision and confidence. This position helps develop reproducible scanning techniques and enhances interpretation before working with live patients.Position #2: Left Lateral Recumbency
Left lateral recumbency training emphasizes locating and assessing the right kidney and adrenal gland, honing skills in optimising focus depth, focal zones, frequency, and zoom for detailed imaging. Users practise measuring organ dimensions accurately and comparing repeated measurements to ensure consistency. Additionally, following the duodenum’s path in both long and short axes helps refine probe movement isolation and image optimisation. Identification and imaging of the right pancreatic limb further develop anatomical recognition and scanning versatility. This position strengthens control over probe manipulation and image quality for confident ultrasound assessment.Position #3: Right Lateral Recumbency
In right lateral recumbency, users focus on locating and optimising images of the left kidney in both long and short axis views, practising probe alignment to maintain the kidney’s horizontal orientation for accurate measurements. They perform comparative measurements with the kidney horizontal and non-horizontal to understand the impact of probe positioning. The training extends to imaging the left adrenal gland, adjusting depth, frequency, zoom, and focus for clear, reproducible assessments, including repeated measurements for consistency. Participants also examine the spleen’s extent and echotexture, practising overlapping sweeps to fully map this and adjacent organs. Finally, scanning the urinary bladder in multiple planes and optimising controls helps highlight anechoic content and outline clarity, reinforcing comprehensive ultrasound skills.How to Assess a Structure on Ultrasound
LEMONS:
L ocation (e.g., anatomical, focal, diffuse)
E chotexture (e.g., hypoechoic, isoechoic, hyperechoic, heterogenous, homogenous)
M easurements (e.g., small, moderate, large, gross or a finite measurement inmm or cm units)
O utline (e.g., irregular, well- or ill-defined, smooth, poorly marginated)
N umbers (e.g., finite number, several, multiple)
S hape (e.g., ovoid, rounded, fusiform, amorphous)
Discovering the 'Skills' Ultrasound Phantom Block
Using the skills phantom block, users align the probe’s long axis with the block to explore and identify all embedded objects from multiple scan angles. Rotating the probe around each object helps build a 3D spatial understanding of their shapes, which vary in complexity. Trainees optimise images and annotate their impressions, capturing representative long and short axis views to confirm their interpretations. Special focus is given to tracking an anechoic tubular structure in both planes, practising fine motor skills essential for following similar pathways in patients. Accurate luminal diameter measurement with proper caliper placement reinforces precision, with reflection on its clinical relevance during abdominal scanning.
Aligning a Needle with the Scan Plane
Users align the probe’s long axis with the phantom block to fully assess the kidney from multiple planes, comparing its ultrasound appearance to the ‘Lillie’ Phantom. They measure regions of interest and capture optimised long and short axis images, using the ‘L.E.M.O.N.S.’ criteria to report findings. Following top tips, trainees plan and practice fine needle aspiration (FNA) of a renal mass, adjusting dynamic range to enhance needle visibility. The technique includes deciding hand dominance for probe and needle control, anchoring the probe to minimise movement, and guiding the needle in-plane toward the target. Users then switch hands to build ambidextrous confidence and precision.
👉 Ready to take your training to the next level?
Contact us here.


